Thursday, October 31, 2019

Music Challenge

When i saw the Music Challenge i knew i had to submit a scrapbooking page. The song i selected is By My side by David Choi.


 It is a very romantic song but everytime i hear it the only person who comes to my mind is my little seven year old grand daughter Rashida my life and the best gift God gave me.
She is an amazing child she will never worry even if her clothes are short or her shoes are tight as she knows that me and my daughter face immense difficulties to bring her up. Even when she is sick when we ask her how she is she will say Amma I am ok and dont worry i will get better soon. If she wants anything she will tell her mama to buy it for her when her mama has money. Even if she gets a lollipop she is very greatful.  Isnt she amazing. She is truly Gods Gift to us.
Though she and i are thousands of miles apart at the moment as soon as she talks to me she knows whether i am in pain or sad. After about five minutes she will ask Amma are you feeling better because we spoke. This is her heart. She is very innocent and kind too and helps her mama around the house and is a good student too.
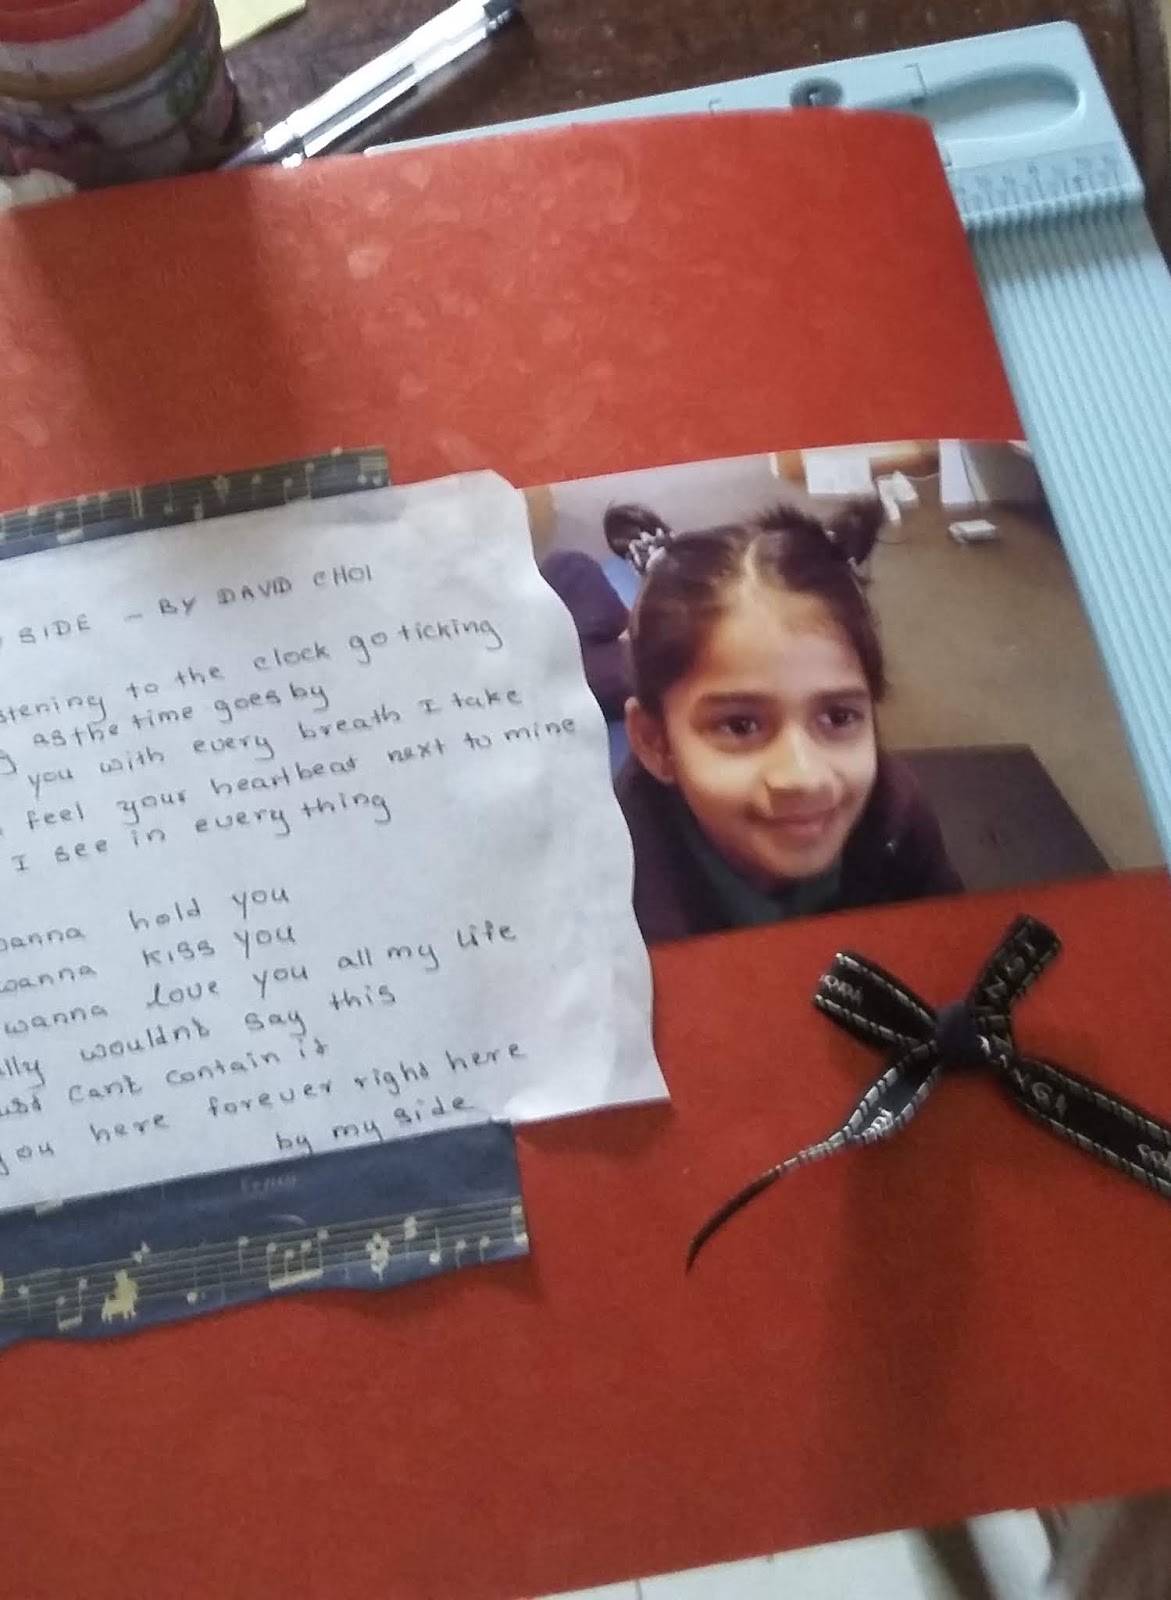
The picture included in the layout was taken by her mama on 30 October when she was ready to go to school.   I hope you like my layout. I kept it really simple as the background is colorful.
I handwrote the lyrics of the song onto a white paper and attached it to a pattern paper with music notes. Then i adhered my little girls photo and attached a black bow as embellishment.


These pix were done by one of my friends using teh above pic. So i am attaching them too.


Blessings and Thank you
Surekha Galagoda

Music challenge

Tuesday, October 29, 2019

Circle Elements

Hi Friends
This is my project for the Pinkfresh Studio Monthly Challenge.
Yesterday i came to check what projects have been created using the Sweet Treats die set by Lizzie M. and i saw the challenge.
I created two cards.
One card uses the Sweet Treats dye by PinkFresh Studio.. It was a part of a gift I won from your company for taking part in a Blog Hop. Thank You.
Method
For this card i cut a circle in Blue and adhered it to a green color card stock. On to that i adhered the Cake base which was cut using two card stock pieces and one pattern paper piece. To that i cut cup cakes using the die in pattern paper and card stock and adhered it together to give dimension. The cup cakes and the cake base was attached using double sided foam tape. I stamped the sentiment Believe in Your Dreams using a Clear stamp. Adhered a blue color bow and to that bow centre i added a blue color circle. i also adhered three green color circles to the corners as it is all about circles.


These are the tiny circles i used.You can just peel them off the sheet and stick them as they have a glue backing.


The next card uses the Fruitastic set from Pink Fresh studio

Method
It is a one layer card but i layered circles with Pink and blue. To that i added an apple and a strawberry from the fruitastic set. I also pasted two lemons. All the fruits were adhered using double sided foam tape to give dimension. I am taking baby steps in coloring and i hope you liked my coloring. I used my Colleen Water Color Pencils sans water to color them as i am still not competent to color using water.


 I also used the Mango smoothie and Frayered Leaf from AltENew Artist Brush Marker starter kit to color the lemons. As i didnt have a nice sentiment i wrote the sentiment using a black gel pen.


Thank You and Blessings
Surekha Galagoda
Surekha Galagoda

Happy Birthday

https://stamplorations.blogspot.com/2019/10/sixth-birthday-day-one-birthday-linky-party.html?showComment=1572346903421#c2032546052279903734


This is the Stamporations sixth Birthday Celebration announcement


One of the cards is a Birthday card included in the order of my first stationery sets for a daughter of a friend of mine. I didnt
 keep a profit as my friends parents entertained all three classes at their home to spend the day which was enjoyed by all the girls. they really do have big hearts. So i only charged for the materials i had to buy such as the pattern paper, some card stock and embellishments..
Method
Took a piece of peach color card stock and i put alayer of a pattern paper with presnts as the next layer. On to that i layered apurple color card stock. The images of cup cakes and the cake base is from the set Sweet Treats set by Pinkfresh studio. It was a set i won for taking part in a Blog Hop . Thank you Pinkfresh Studio. I colored the cup cake in the middle with AlteNew Artist Marker Starter set using the colors Magnolia Smoothie and Cotton Candy. It was also a part of a gift for taking part in a blog Hop.Thank you AlteNew.
I adhered the cup cakes and the cake base using double sided foam tape to give dimension. I also dye cut the cake base three time two times using white card stock and once using a pattern paper.   I stamped the sentiment Happy Birthday using AlteNew crisp dye ink color Crimson.     


I am linking this card to the STAMPorations sixth Birthday blog Hop
.
STAMPorations I came to your blog and shop through Monika Skinner when i took part in the Cat Lovers Hop.
 I simply love your products and you are offering free shipping with purchases of $70 or more which is fantastic for a person like me who is mobile between Sunny Sri Lanka and New Zealand. They also have the Build your stash subscription where u can buy $45 worth of  products fr $30 with free shipping which i think is super fantastic. Happy sixth Birthday STAMPorations and may you grow from strength to strength.

Thank You and Blessings
Surekha Galagoda

Wednesday, October 23, 2019

Birthday Present


This stationery set was made as a birthday present for my Friend, son and confidante whom I can share everything and not be judged. He is one of the sweetest human beings i have met and i thank God for our friendship. His Birthday was on the 10th of October and his favourite colors are Black and white. I had to  find pattern paper and everything including ribbon card stock etc in black and white.


The measurements for the set was from Maymay made it and i will link it below.
https://www.maymaymadeit.com/blogs/news/stationary-box-gift-set
Though I got the measurements from her once i made the stationery box it was not closing properly so i had to add another piece to it so that it closes snugly.

It has compartments for greeting cards, note cards, gift tags and stamps too. I handmade a note book and added a pen too.


All the greeting cards too were handmade by me using scraps of pattern paper and a die from couture creations.


  I made note cards. For the note cards i die cut the words hello, hugs and adhered it using clear glue. To decorate the tags i used the flower dies from Couture Creations and to each flower i added a matching gem/rhinestone and tied a ribbon after punching a hole..


Oh it was really fun and i enjoyed every minute of it. To customise the pen i took a thin strip of paper from the pattern paper i used for the stationery set and  rolled it around the carbon and inserted it. It is also a tip i picked from Maymay. Thank you May May. I completed the set by tying a ribbon.


The gift bag to put the gift and the cards was also made by me using one sheet of pattern paper.


 I inserted ribbon for the handles and made a gift tag using a piece of the pattern paper and it was attached to the bag. To put another gift card i made another small bag and it all fits in here.

I made the card too in black and white. I took a white card base and adhered a piece of black card stock. I cut flowers using a tiny pretty die from Couture Creations in white card stock. I had some pieces from a die cut of a unicorn which looked like a wine. I adhered that and colored it green and on to that i stuck the flowers using double sided tape. I stamped the sentiment Happy Birthday using black ink. I put a belly band and stuck a butterfly. i didnt have a black butterfly so i took a blue color one and inked it black and it looks dark blue and shiny. I made a matching envelope too by adhering black die cut flowers to a white envelope..


This is the gift tag i made by fussy cutting a piece of pattern paper from which i made the gift bag. Then i attached a piece of  black ribbon so that i could tie it to the gift bag.

I am sorry ladies my pix are not clear as i take them using my phone and i am not a good photographer. My hubby who was a very gd photographer left this world three years ago and i never thought i would have to learn phtography but now I want to and have asked one of my friends to teach me and until i sort it please bear with me.


Thank you and Blessings
Surekha Galagoda

I am linking this to
https://mixitupchallenge.blogspot.com/

Cat lovers

These are the two cards i made for the Cat lovers Hop hosted by lovely Janice


These two cards are dedicated for my one and only daughter Sapumali who has made me proud by getting through her Level five Diploma in Cookery with all A passes. On Sunday she was running a temprature but still she was on her feet practicing for her final assignment which was to make 12 dishes within six hours. She started full time employment this week. I am sharing my happiness with all of you. Her faith in Jesus keeps her going.


   This is my daughter Sapu and my grand daughter Rashida. They are my everything


She is alone in Christchurch NewZealand with my seven year old grand daughter looking after the daughter with love and care, doing her studies working part time as a chef, maintaining a home and attending to all other work. Roma and her family help my daughter to lookafter the little girl.

I made two white card bases and adhered a pattern paper full of cats
.

 Then i stamped a naughty cat image using black ink. I stamped the sentiment flying high using the Altenew crisp dye ink violet.


Now was the highlight. I have always sucked at coloring let alone drawing but today i had to do it. I colored the naughty cat image using Colleen Water color Pencils but i didnt use water as i didnt have any practice in it.

I first used black and then toned it down with grey. I painted the wings in pink.  If i have done a ok job of colorig it is all thanks to you lovely ladies who have shown how to color in your videos. Thank you so much.

My set of colleen water color penscils


I added small a small embelishment and here it is.

I adeed a vellum belly band to give a complete look. Added a butterfly cut from pattern paper and stuck it to the bellyband using double sided foam tape.


Tip
As a new crafter i always test the images and inks on a separate piece of card stock before using it on the good piece so that i know how it stamps and the colors too.
As soon as i finish stamping i clean my stamps and clear blocks  because if i keep it,  it will never be done. Ha Ha lazy me.
Once i finish aproject i clean my stuff and keep it in the place it ought to be and it has helped me to maintain a clean room and desk and be efficient as i juggle a job as a journalist and my first love crafting in addition to learning Korean and Chinese simultaneously.


This is our youngest cat named chooti snuggled inside my hand bag

I am sorry i am not a good photographer not even ok. Iam going to learn it from a friend of mine. Until then please bear with me.


Iam linking this card to
https://herpeacefulgarden.blogspot.com/2019/10/main-hop-page-2019-cat-lovers-hop.html?

I am linking this card to


https://craftycatzweeklychallenge.blogspot.com/2019/10/craftycatz-challenge-479-atg.htmlSurekha Galagoda


Thank You and Blessings
Surekha GalagodaSurekha Galagoda

Saturday, October 19, 2019

Smile

Surekha GalagodaMy wish is for everybody to smile all the time so I thought of naming it smile and i also used the word die Smile from Pinkfresh Studio to adorn my cards.
I made two cards using the same word die which i cut in silver and blue glitter card stock. Since the word die was in glitter card stock i decided not to use any embellishments other than pasting two pictures of cakes to add the sweet element using foam squares to give dimension.

Until upto this project i used to measure and cut my card stock yes i know i am a big time fool. Lol. But when i asked my craft guru Dr Sonia she told me to get a score tool and i bought the score Pal buddy from SSS and i am so happy i did it. Ah i even got a pouch for it which is very handy when travelling. It has made scoring a breeze and i am just wondering why i didnt buy it sooner.But better late than never.

Thank You and Blessings
Surekha Galagoda

I am linking these two cards to the Twofer challenge


Thursday, October 17, 2019

Inside Out

Hi Friends
This is also from  the set of cards i made to tuck inside the stationery set to be given as a Birthday gift to my friend and Son who has held my hand at difficult times.
The front of the card was made by pasting a piece of a pretty pattern paper which was a left over in my stash. Then i cut a flower from a Stamping, embossing and die cutting set from Couture creations. I really love the tiny flowers in the set and when i am free i die cut some different colors and keep so that i can use them in cards.


i took the flower and pressed the middle with a ball point tip to make it raised. Then i added a white gemstone to the centre and stamped the sentiment Especially For you using a clear stamp.

As my friend like simple decorations I took a happy birthday sentiment and stuck it to the base using foam squares to give dimension. Then i also added a butterfly using a small foam square. Always when i have time i decorate the inside to make the recipient happy.


    I Prefer the CAS cards as i am still a new crafter.


Thank You and Blessings
Surekha Galagoda


The sky is the limit

All things space, Galaxy and aliens and space ships

These two cards are from a set of cards i made to be tucked inside the stationery set to be given for my Friend and Sons Birthday.
 His favorite colors are Black and white so my major color combination are those two.
For this card I cut an oval to represent a space ship and used scrap pieces to decorate the card. The oval is adhered to the card base using foam squares and the sentiment is a clear stamp. 
  For this card too i used scraps from the papers I used to decorate the stationery set and stamped the sentiment  Wonder which is a clear stamp.
Since i am a new crafter i prefer to keep my cards CAS style.


 I was wondering how to use my scraps and i found a video by Jennifer Mcguire on how she uses her scraps. She even keeps the tiniest bits.https://www.jennifermcguireink.com/blog This is the link to her awesome blog. If you have time please visit her she is an amazing crafter and a lady with a really a big heart.

Thank you and Blessings
Surekha Galagoda

I am linking this card to
snarkystampers.blogspot .com for Anything to do with Space Galaxy, aliens space ships etc
.